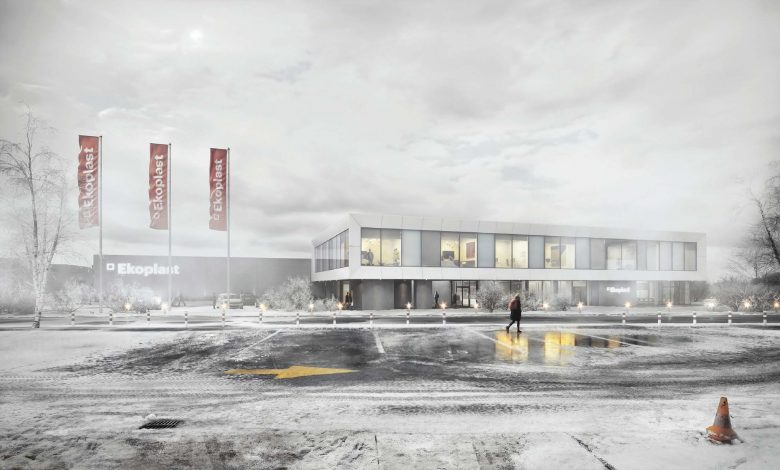
3D Architectural Visualization In Oman
3D Architectural Visualization

10 Reasons That Make Our 3D Furniture Rendering Services Unique
At Render Atelier we pride ourselves on our ability to deliver 3D Architectural furniture rendering services on time while still maintaining an exceptionally high quality. We can do this because:
- We are great at what we do.
- We have a lot of experience.
- We always work with a plan.
This is our approach to seamless, hassle-free 3D Architectural rendering and visualization. If you are a 3D furniture designer or maker, this post can take a behind-the-scenes look at our creative process and show you how we do what we do!
Read Also: 3D Architectural Visualization In Oman
When it comes to 3D furniture rendering services and lifestyle visualizations that create the perfect atmosphere, maintaining a photorealistic and accurate representation for presentations and advertising is paramount. Our 3D visualization company uses world class CGI and 3D Architectural rendering software to bring the smallest details to life. Read on to learn how our 3D furniture rendering services stand out from the crowd.
Steps That Make Our 3D Architectural Furniture Rendering Services Unique
Step 1: Gather References
At Render Atelier, every 3D furniture rendering project begins with collecting our raw material, blueprints, sketches, props or photos. It is best if we have as much information as possible at this point so that we can deliver exactly what you need without making any corrections or changes. We generally do not recommend verbal descriptions as too many details are lost in the fog of language. Words are vague, numbers and numbers are concrete. How fast we can deliver depends a lot on the material our 3D artists receive. The more information, the better.
Step 2: Setting Up The Stage
Sometimes the customer just needs a 3D Architectural visualization against a solid white background. However, when designing material for an advertisement or magazine catalog, it is best to set up your furniture in a realistic setting so that your customers can easily visualize your products. Our 3D artist first creates the room from basic shapes: blank walls, floor and ceiling, and a rough plan for the placement of the product, as well as other decorations and textures. Once the scene is set, they will also get an idea of which direction they want the primary light source to go.
Step 3: Bring The 3D Architectural Furniture Home
Once the space is ready, our 3D artist will place the pre-made object or create the object from scratch using the resources collected in the first step. In this step, adjusting the furniture size to the room is of the utmost importance. To maintain photorealistic visualization, we need to get this right or your customers will be misled. In this step, we also determine the position and viewing angle that will reveal the best aspects of your furniture.
Step 4: Lights!
With the top line tools, we can recreate any light condition and play god with shadow and light. To create realistic lighting, let’s start with the primary light source. In most cases we choose daylight, this forms the base layer of the light. However, they never have a single source of light and so we play around with reflecting primary light off the ceiling and other surfaces in the room. Next we add lamps, lights, etc. Each of these lights highlight different types of textures in the room. We choose what works best with your product. In addition to light, you also have a shadow. Our 3D artist carefully ensures that each shadow matches the light source and is as close to life as possible.
Step 5: Texture And Textile
Here we dress up the room and create an atmosphere. Once the space is lit to showcase your product, we will work to complement it by designing it around it. Our team consists of interior designers and architects. With your contributions, we digitally create a visually breathtaking virtual world. If we play with colors and textures, we can create a warm, cozy environment or something minimal and professional. In order to make the picture visually appealing, we manufacture a pallet around your piece of furniture. In addition, we add a bit of atmosphere, for example a light curtain that is tousled by the breeze.
Step 6: Decor
To complete the look, we add in the decor, these objects are sometimes suggested by our clients, but most of the time our interior designers suggest objects from our digital library that go well with the overall look of the room. We use everything from picture frames to carpets, pillows, flower vases, books, etc. All of these elements create a more organic and natural environment.
Step 7: Camera Angles
When you work in the virtual world, you have the luxury of choosing any camera angle you want. We design our lifestyle furniture visualizations as entire rooms, not just as separate recordings, so that it is technically possible to show every nook and cranny. That being said, there is no need to have a picture under your piece of furniture! For presentations and advertising material, you only need 3 or 4 good angles that bring out your design. Here we take a look at whether our placement in step 3 got to the point and whether everything looks visually appealing.
Step 8: The First Stage Of Rendering
At this stage, we test our design using an interior rendering software such as 3DS Max. Various reviews and specialists are carried out to verify the results. If malfunctions, overloads or lighting errors are detected, these are rectified immediately. This is by far the most important and time-consuming part of the process.
Step 9: The Final Rendering
Despite all our experience, sometimes things go wrong. If, during testing, we discover that something is not in the right place, we correct it at this stage. We also let your customers check the progress of the 3D furniture project and if they have any input or want changes, we implement them at this point. Once it’s set, our software processes it and the final rendering is done.
Step 10: Polishing After Production
At Render Atelier 3D Architectural Rendering, we are a bit obsessed with perfection when it comes to providing 3D furniture rendering services. After the final stage of rendering, our 3D Architectural artist uses graphic editors to tweak the smallest details, retouch shadows and highlights, and adjust colors. At this stage, every aspect of the project is carefully examined and if fine-tuning is required, it is carried out. As soon as we are satisfied with the finished product, we lean back and just marvel at it.
Seven Tips To Improve Your Architect
1. Too Many Colors
Most photographers will say not to use more than 3 colors per shot; we agree. There is an easy way to test this. In Photoshop, you can press a button to make the image black and white. If your image looks better in black and white, then you know that too many colors are used.
2. Too Bright
Shadows are as important as lighting. This is self-evident, but if there is no light, we will not be able to see anything on the renderer. The problem with too much light in the scene is that you can’t see any details. Everything was washed away. Lighting is also an important tool that can convey where you want your audience to watch. Vignetting is a very important tool for aligning the viewer’s eyes to the center of the image. This is done by slightly darkening the edges of the photo. When it’s done correctly, you won’t even register the operation being performed.
3. There is no natural
The external scene needs to be natural. This is one of the largest areas where most external rendering disappears. Adding a lot of trees, small bushes and a few details is probably one of the most time-consuming parts of creating a 3D rendering. One thing we have to do is to create a tree generator and place the trees in the area where we want to draw them. For example, in SketchUp, the number of trees and polygons you can place in the scene is limited. The larger the scene, the longer it takes to move through the scene and open it first. For us, this is not a problem. Believe it or not, in some cases, we didn’t even store the trees in the scene. We keep them as reference objects and pull them in when rendering, which saves system resources and time to place the tree.
4. Meaningless
We often hear that 3D images are too sterile. Yes, some people are not good at creating 3D images, but the responsibility lies with the artist, not the technology. You don’t want customers to look at the image and say “that…”, whether it is a 3D image, a watercolor painting or something else. Even if he/she does not know how to use the 3D application in question, it would be very helpful to have an architect who has a staff who understands photography. What photographers do is look at a good angle, and they know where to place the camera. Take Hufton + Crow, Helene Binet or David Leventi (three famous architectural photographers) as examples. Compared with most amateur photographers with a brand new $6,000 SLR camera, these photographers can take better and more interesting photos with a $16 disposable Kodak camera.
5. No Personality
Consider a character you want to live or work in this space. This can be time-consuming, but it will make it easier for customers or potential customers to believe that they are in this field. This is why the staged houses sell better than the empty houses. When you don’t provide them with background information, it’s hard for people to imagine what they are in this space. One of the most interesting objections I hear from people is that 3D doesn’t look realistic. This is only true when people look at 3D images with no personality. 3D is a tool, but it needs someone who can give the space some personality to make the image have the WOW factor.
6. Avoid Using Wide-Angle Lenses
Everyone wants to use a wide-angle lens because they want to see the entire scene or building. But when you do this, your eyes don’t know where to look. By zooming in on an aspect, it allows people to focus on a small part and can better understand what they are looking at. This is also a difficult thing, because in most projects, both the client and the architect want to know something about the whole place. One of the best ways to solve this problem is to create multiple small focusing cameras, but also include the overall shot.
7. No Focus Element?
This does not refer to the object that the camera is focusing on, but something that immediately draws your attention and forces you to look in it, such as a fireplace, artwork or custom desk.
That’s its people; We don’t have a magic wand, no quick fix, just old hard work and diligence. It takes a tremendous amount of skill, hours and hours of work, and patience to put together a stunning digital work of art.
Contact us to learn more about our 3D furniture rendering services and how we can help your business grow. Let us know if you have any questions, we’ll be happy to help.


